Solar energy is one of the most accessible renewable energy sources, and using it to heat water is an excellent way to reduce energy costs and contribute to environmental sustainability. By tapping into the sun’s free and abundant energy, you can decrease your reliance on traditional water heating methods, lower your carbon footprint, and enjoy significant savings on utility bills.
While the idea of installing a solar water heating system might seem intimidating, it’s a project that many homeowners can tackle with proper preparation. Whether you’re looking to heat water for household use, a pool, or other applications, the process becomes manageable when broken down into clear steps. Plus, the satisfaction of building a system that leverages renewable energy is unmatched!
In the sections that follow, we’ll explore everything you need to know about crafting your own DIY solar water heating system. From planning and gathering the right materials to step-by-step installation and ongoing maintenance, this guide will walk you through the process with ease and confidence. Let’s dive in!
Benefits of a DIY Solar Water Heating System
Embarking on a DIY solar water heating project offers a host of advantages that make it a worthwhile investment of your time and effort. Here’s why creating your own system can be a game-changer for your home and the environment:
1. Energy Savings
One of the most compelling reasons to build a solar water heating system is the potential to significantly reduce your energy bills. Traditional water heaters rely on electricity or gas, both of which can be costly. By harnessing solar energy, you tap into a free, renewable resource to power your water heating needs. Over time, these savings can add up, making a noticeable difference in your household budget.
2. Eco-Friendly Solution
Solar energy is clean and renewable, meaning it doesn’t contribute to greenhouse gas emissions or air pollution. By installing a solar water heating system, you take a proactive step toward reducing your carbon footprint and supporting global sustainability efforts. This is a practical way to align your home’s energy use with environmentally conscious values.
3. Cost-Effectiveness
Professionally installed solar water heating systems or pre-made kits can be expensive. However, a DIY approach allows you to save on labor costs and choose materials that fit your budget. With proper planning and sourcing, you can create an effective system for a fraction of the cost.
4. Customizable Design
A DIY project gives you complete control over the design and functionality of your system. Whether you want a compact setup for a small household or a larger system for high water usage, you can tailor it to meet your specific requirements. This flexibility ensures your system aligns perfectly with your needs and preferences.

Step 1: Planning Your Solar Water Heating System
Proper planning is the foundation of a successful DIY solar water heating project. By understanding your needs, selecting the right location, and choosing an appropriate system type, you can ensure optimal performance and long-term benefits. Let’s break it down:
1. Determine Your Needs
Start by assessing your household’s daily hot water consumption. This will help you decide the size and capacity of your solar water heating system.
- Daily Usage: Consider how much hot water your household uses for activities like bathing, cooking, and cleaning. A family of four typically consumes 60–80 gallons of hot water per day.
- Purpose: Decide if the system will be your primary source of hot water or a supplementary addition to your existing heater. If it’s supplemental, you may opt for a smaller or simpler setup.
2. Choose the Right Location
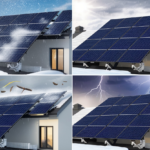
The performance of your solar water heating system heavily depends on its placement. Solar collectors need maximum exposure to sunlight.
- Sunny Spot: Identify a location like your roof, backyard, or any open area with direct sunlight for most of the day. South-facing areas are ideal in the Northern Hemisphere, while north-facing areas work best in the Southern Hemisphere.
- Shade-Free Zone: Ensure the spot is free from shade caused by trees, buildings, or other obstructions. Even partial shading can significantly reduce efficiency.
- Structural Suitability: If installing on a roof, confirm it can support the weight of solar collectors and additional hardware.
3. Select a System Type
Choosing the right solar water heating system type is crucial for meeting your household needs and adapting to your local climate:
- Batch Systems: These are simple and budget-friendly, ideal for small households or regions with mild climates. Water is heated directly in a tank or series of pipes exposed to sunlight.
- Flat Plate Collectors: These are versatile and efficient for households with moderate water demands in warmer climates. They use insulated boxes with a glass cover to trap heat efficiently.
- Evacuated Tube Systems: If you live in a cold region, this type is your best bet. It uses vacuum-sealed tubes to capture and retain heat, ensuring high efficiency even in low temperatures.
With a well-thought-out plan, you’re ready to move forward to gathering materials and preparing for installation. Let me know when to continue!

Step 2: Gathering Materials and Tools
Equipping yourself with the right materials and tools is essential for a smooth and efficient DIY solar water heating system installation. Here’s a detailed checklist and explanation of what you’ll need:
Materials
- Solar Collector
- Pre-made collectors or DIY materials such as:
- Copper Pipes: Excellent heat conduction for water flow.
- Glass: Acts as a cover to trap heat.
- Insulation: Reduces heat loss and enhances efficiency.
- Tip: If building your own, ensure the materials are durable and weather-resistant.
- Pre-made collectors or DIY materials such as:
- Storage Tank
- Repurpose an old water heater tank or purchase a new one.
- Opt for a tank with an insulating layer to retain heat longer.
- Ensure the tank capacity matches your household’s hot water needs (e.g., 50–100 gallons for most families).
- Piping and Fittings
- Copper or PEX Pipes: Both are durable, but copper is better for heat transfer.
- Fittings: Use compatible connectors, elbows, and T-joints for the piping system.
- Insulation
- Wrap pipes and the tank with foam or fiberglass insulation to prevent heat loss.
- High-temperature pipe insulation is best for solar systems exposed to outdoor elements.
- Mounting Hardware
- Use brackets, clamps, and screws to securely mount the solar collector.
- Ensure the hardware is rust-resistant and can handle the weight and exposure.
Tools
- Pipe Cutter
- Necessary for cutting pipes to the required lengths with precision.
- Drill and Screws
- Essential for securing mounting brackets and other components.
- Wrenches
- Use adjustable wrenches for tightening pipe fittings and securing valves.
- Silicone Sealant
- Seal joints and fittings to prevent leaks in the system.
- Choose a high-temperature-resistant sealant for durability.
- Temperature Gauges and Valves
- Install gauges to monitor the water temperature effectively.
- Pressure relief and mixing valves ensure system safety and water temperature control.
Step 3: Assembling the Solar Collector
The solar collector is the central component of your DIY solar water heating system, responsible for capturing sunlight and converting it into heat for your water. Here’s a detailed guide to assembling the solar collector:
1. Build the Frame
- Purpose: The frame provides structural support to hold the absorber, insulation, and glazing in place.
- Materials:
- Wood: Easy to work with and cost-effective.
- Metal: Durable and weather-resistant, ideal for outdoor exposure.
- Steps:
- Measure and cut the material to create a rectangular frame. The size depends on your desired collector dimensions (e.g., 4×8 feet for standard systems).
- Assemble the frame using screws or nails to ensure it’s sturdy and weatherproof.
- Add mounting brackets if the frame will be installed at an angle on a roof or the ground.
2. Install the Absorber
- Purpose: The absorber captures sunlight and transfers the heat to water flowing through the pipes.
- Materials:
- Copper pipes: Best for heat conduction.
- Metal sheet: Aluminum or steel coated in black paint.
- Steps:
- Attach copper pipes or coils to the base of the frame using brackets or clamps. Space them evenly for maximum heat distribution.
- If using a metal sheet, secure it to the frame and connect the pipes to the sheet’s surface for better heat transfer.
- Paint the absorber (pipes and/or metal sheet) with heat-resistant, matte black paint to maximize heat absorption.
3. Add Insulation and Glazing
- Insulation:
- Purpose: Minimizes heat loss by retaining the captured heat within the collector.
- Materials: Rigid foam board, fiberglass, or other high-temperature insulation materials.
- Steps:
- Line the back and sides of the frame with insulation.
- Ensure a snug fit to prevent gaps where heat could escape.
- Glazing:
- Purpose: Protects the absorber and traps heat inside the collector.
- Materials: Tempered glass or clear polycarbonate.
- Steps:
- Cut the glazing material to match the frame dimensions.
- Secure it to the top of the frame using silicone sealant and screws to create an airtight barrier.
- Ensure the glazing is slightly angled to allow rainwater runoff and reduce dirt buildup.
By completing these steps, your solar collector will be ready to capture sunlight and heat water efficiently. Let me know when you’re ready for Step 4: Installing the System!

Step 4: Setting Up the Storage Tank
The storage tank is an essential component of your DIY solar water heating system, as it stores the heated water collected by the solar panels. Proper setup ensures efficiency and consistent performance.
1. Position the Tank
- Location:
- Place the tank close to the collector to minimize heat loss during water transfer.
- If you’re using a thermosiphon system (where water flows naturally due to temperature differences), position the tank higher than the collector. This allows hot water to rise into the tank and cooler water to flow back into the collector.
- Stability:
- Secure the tank on a sturdy platform or stand to prevent shifting or accidents.
- Ensure the platform can support the tank’s weight when full.
2. Connect the Pipes
- Pipe Material:
- Use insulated pipes (preferably copper or PEX) to minimize heat loss during water transfer.
- Connection Steps:
- Attach one pipe from the collector outlet (hot water side) to the tank’s hot water inlet.
- Connect a second pipe from the tank’s cold water outlet to the collector’s cold water inlet. This creates a closed-loop system for water circulation.
- Seal all connections with pipe fittings and silicone sealant to prevent leaks.
- Check Valves:
- Install check valves in the pipe system to prevent reverse water flow, especially during cooler periods or at night when the collector may lose heat.
3. Integrate the Backup System
- Purpose:
- A backup heating system ensures you have a reliable hot water supply on cloudy days or during high demand.
- Integration Steps:
- Connect the storage tank’s hot water outlet to the input of an electric or gas water heater.
- Add a temperature sensor or thermostat to the system to regulate when the backup heater activates.
- Use shutoff valves to isolate the backup system when it’s not needed.
Step 5: Installing the System
- Secure the Collector:
- Mount the solar collector at an angle optimized for your geographic location (usually 30–45 degrees).
- Connect the Plumbing:
- Attach the pipes from the collector to the storage tank and ensure all connections are leak-proof.
- Add Sensors and Controls:
- Install a temperature gauge and pressure relief valve for safety.
- Consider adding a pump and controller for active systems.
Step 6: Testing and Maintenance
Proper testing and regular maintenance are crucial to ensure your DIY solar water heating system operates efficiently and lasts for years. This step will guide you through testing your system after installation and performing routine upkeep to maintain optimal performance.
Testing Your Solar Water Heating System
- Fill the System
- Open all valves and fill the system with water.
- Check for leaks at all connections, including the collector, pipes, and storage tank.
- Tighten fittings or apply additional sealant if leaks are detected.
- Monitor Temperature and Water Flow
- Temperature Check: After a sunny day, measure the water temperature at the tank outlet to ensure the collector is heating effectively.
- Flow Check: Verify consistent water flow between the collector and the tank. Uneven flow may indicate blockages or air pockets in the system.
- Test the Backup Heater
- If integrated, turn on the backup heater and ensure it works seamlessly with the solar system.
Maintaining Your Solar Water Heating System
- Clean the Collector Surface
- Dirt, dust, and debris can reduce the collector’s efficiency.
- Clean the glass or polycarbonate surface with a soft cloth and mild detergent every 3-6 months.
- Inspect Pipes and Fittings
- Regularly check for signs of wear, corrosion, or damage in the pipes and fittings.
- Replace any compromised components promptly to prevent leaks or inefficiency.
- Flush the System Annually
- Over time, sediment can accumulate in the storage tank, reducing its capacity and efficiency.
- Drain and flush the tank once a year to remove sediment and maintain optimal performance.
- Check Insulation
- Inspect pipe insulation for cracks or degradation and replace damaged sections to minimize heat loss.
Proactive Tips for Long-Term Efficiency
- Seasonal Adjustments: Reposition the collector to optimize sunlight exposure during different seasons if it’s adjustable.
- Monitor Performance: Keep track of water temperatures and energy savings to ensure the system is meeting your needs.
- Professional Inspection: Consider having a professional inspect your system every few years for a comprehensive check-up.
Conclusion: Start Your DIY Solar Journey
Creating your own solar water heating system is more than just a cost-saving project—it’s a step toward energy independence and environmental sustainability. By implementing the steps outlined in this guide, you’ll not only reduce your carbon footprint but also enjoy lower energy bills and the pride of crafting a practical solution for your home.
Ready to embrace the power of the sun? Start by exploring DIY solar water heating kits or sourcing materials from local suppliers. With careful planning and a little effort, you’ll soon enjoy the benefits of warm, eco-friendly water while making a positive impact on the environment.